Wow, how do you make these???
- Judith Nusimovici
- Jan 21, 2024
- 2 min read

This is something people often ask when they see my cheese slicing boards and presentation trays. Well, there is no great mystery and nothing much more than a lot of patience and work and a touch of creativity.
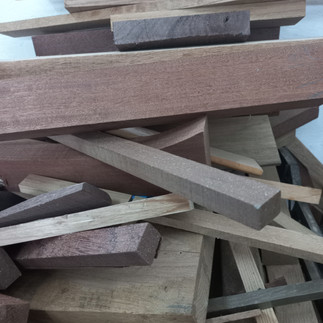
I started by making these boards and other small objects because I just can’t throw out wood. So, when the leftovers of larger builds keep piling up in the workshop one starts playing around and randomly glueing things together and see what could come out of it.
First things first the different pieces of scrap wood need to be selected, milled, arranged by color and finally glued together. Once the multi-color, multi-essence wood board has been built and cleaned, it is cut at an angle. This will allow a chevron pattern if wanted.


Now that the “decorative stock board” is ready, it is time to start slicing away. Large stripes, thin strips, there is no rule. Play around with them, and … again glue them together.


OK so we are happy with our ornamental strips of wood, but what about the rest of the board. One of the main problems with wooden boards is that they can warp, and we do not want this to happen. Wood is a living matter, so we can never guarantee at a 100% that the wood won't move, but we can do all that is necessary to prevent it as much as wood will allow us to. In order to minimize wood movement, you need to take dry and acclimated wood. Movement is mostly noticed cross grain (expanding or shrinking in width) and happens when there are variations in the level of humidity in the air. The narrower the plank, the fewer variations there are. Another important thing on this topic is that wood “pulls towards the heart,” this will cause cupping. That is why it is better to mill the wood once it has “pulled.” In addition, and in order to prevent cupping the different planks making the board should be assembled so that the “pulling” is in opposite directions. This will allow the movement in different directions to compensate one another.


The ornamental stripe is ready, the solid oak planks have been selected, milled and organized. All that is left is to glue everything together.


And that is how these designs are made. Of course, the work doesn’t end there: cutting everything to size, rounding the sides, sanding, finishing, installing the hardware when applicable, etc. But those last steps are common to any piece of woodworking.


It’s really beautiful!